13.9.2019 - JP Lyytinen
Community Challenge
We held a small challenge in our Discord server rewarding the most active weekly member with a “shard”. Everyone with 10 shards (10 weeks of being most active) would get a character with their likeness in the game!
And as it turned out two heroes came out on top: Juke and Humppa. Congratulations, you will be appearing in Iron Danger. There’s no greater joy than killing yourself in a game.
Modeling a likeness
Modeling characters is hard. Modeling characters with certain likeness is hard and tricky. The latter is easier in a sense you don’t need to invent anything new but harder because you need to match those forms exactly. For Iron Danger I would be modeling these characters with certain likeness and keeping them consistent with the game’s style. Very much like creating a caricature: stylized forms but with a resemblance. There’s many ways to approach the subject. You can go old school and slap a photograph on a cube and call it done or you can go for photogrammetric solutions to scan an entire person. I went with the traditional polygon modeling. Here’s how.
First of all, here are the gentlemen:

Well. Had I been a bit more specific I might’ve requested the reference images with a few requirements:
- High resolution
- Flat lighting preferred. No bright highlights or dark shadows
- Multiple images from all sides
- Longer focal length preferred
No biggie, I’ll work with what I have. I start with an existing model made by our character artist Lance Baker.

Next, the reference is projected from the camera on the geometry and I can start matching the camera properties with the image.
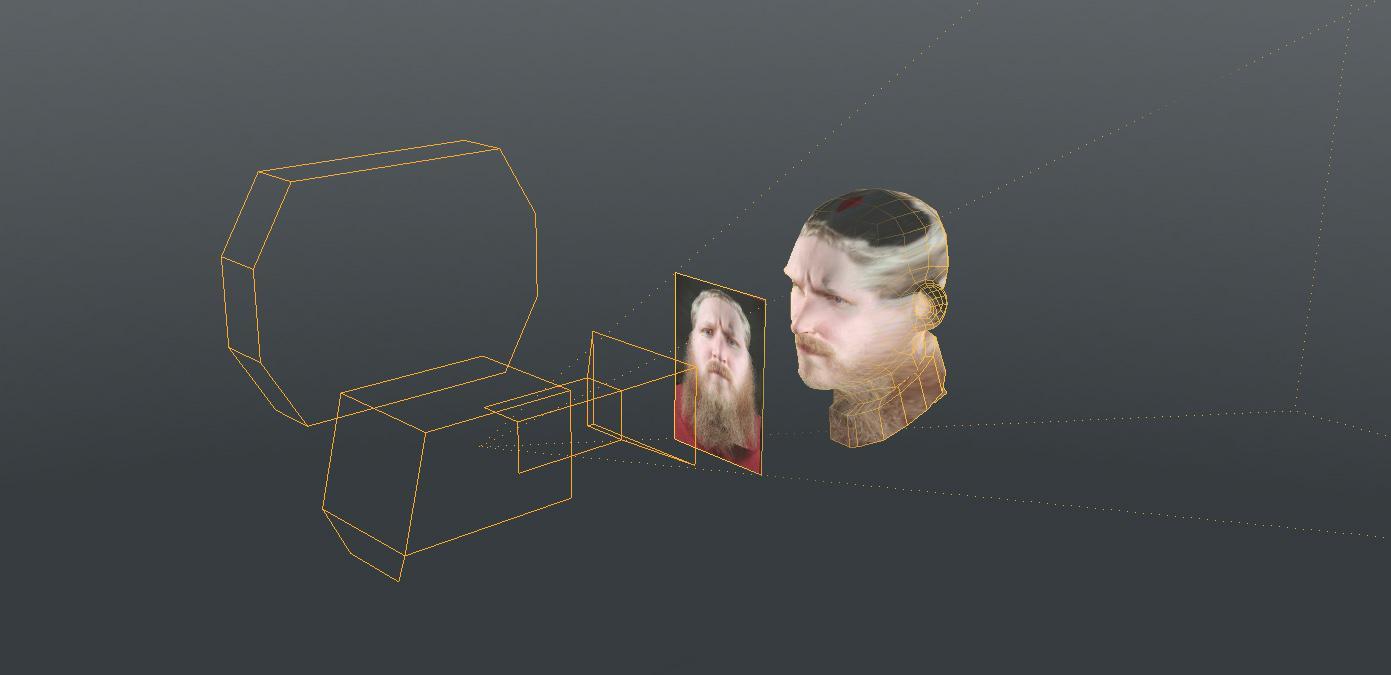
I use the eyes as a reference point and start approximating camera position and focal length. Here you see how the focal length affects the perspective. The reference image has somewhat wide field of view so some of the facial features get obscured.
After eyeballing the camera into place it is locked and I move on to edit the geometry. I only have the one reference image so a certain amount of guesswork is involved.
Alright, close enough. Notice that I’ve cleaned out some of the shadows from the projected image. I will be blending some of the reference image into the final game texture.
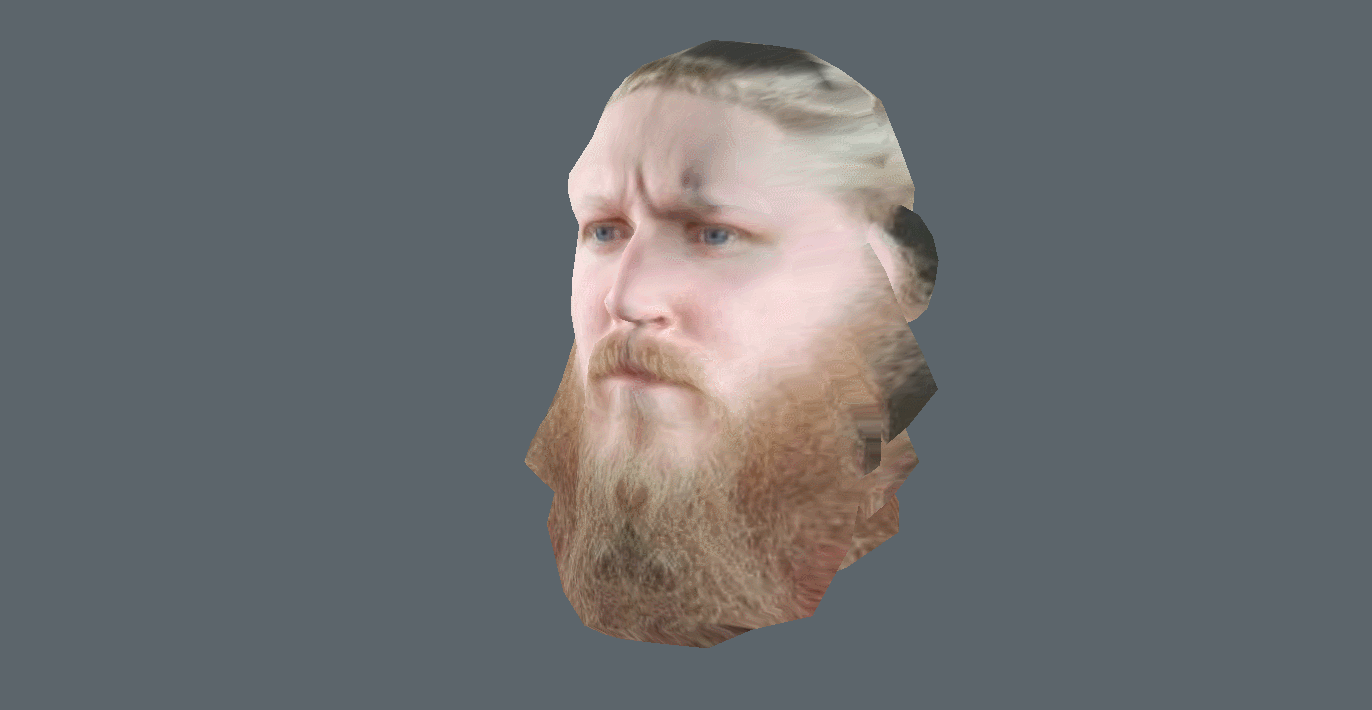
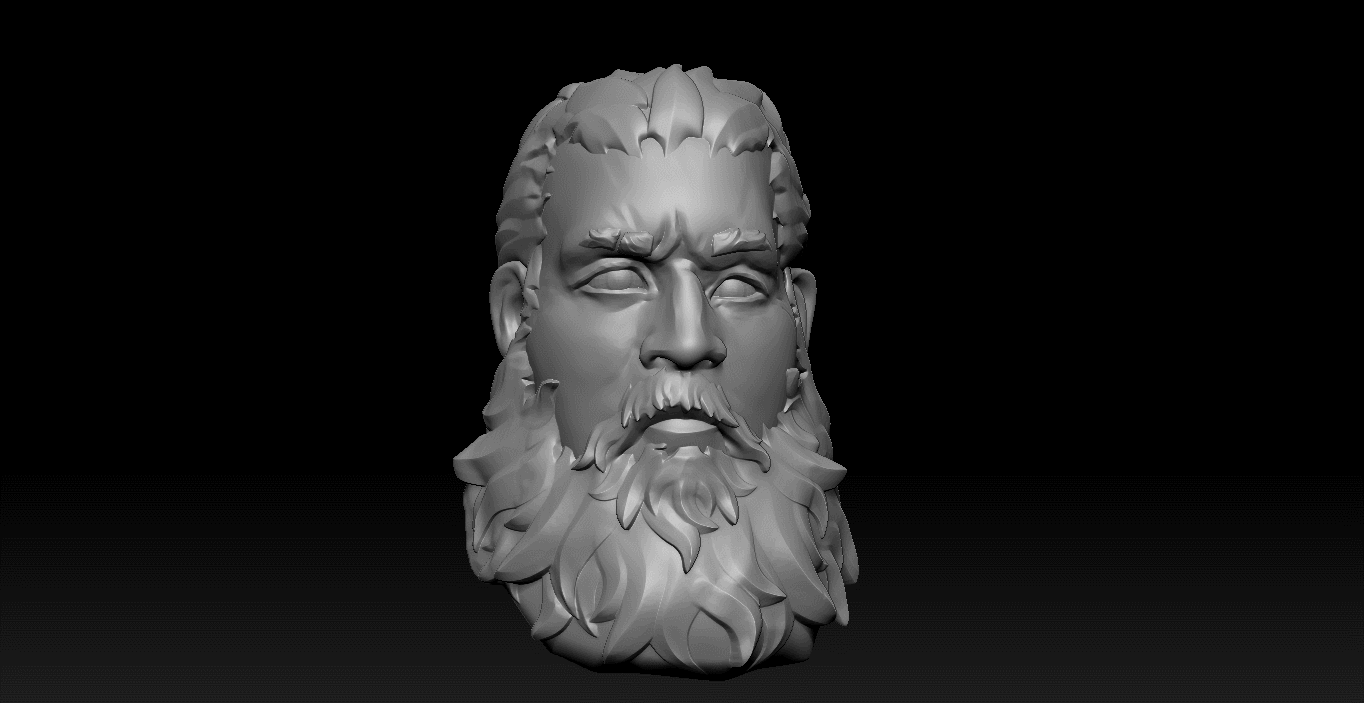
Next step is to bring the model into ZBrush for cleanup and further stylization. This is probably the most difficult part. Some of the resemblance is admittedly lost with the stylization.
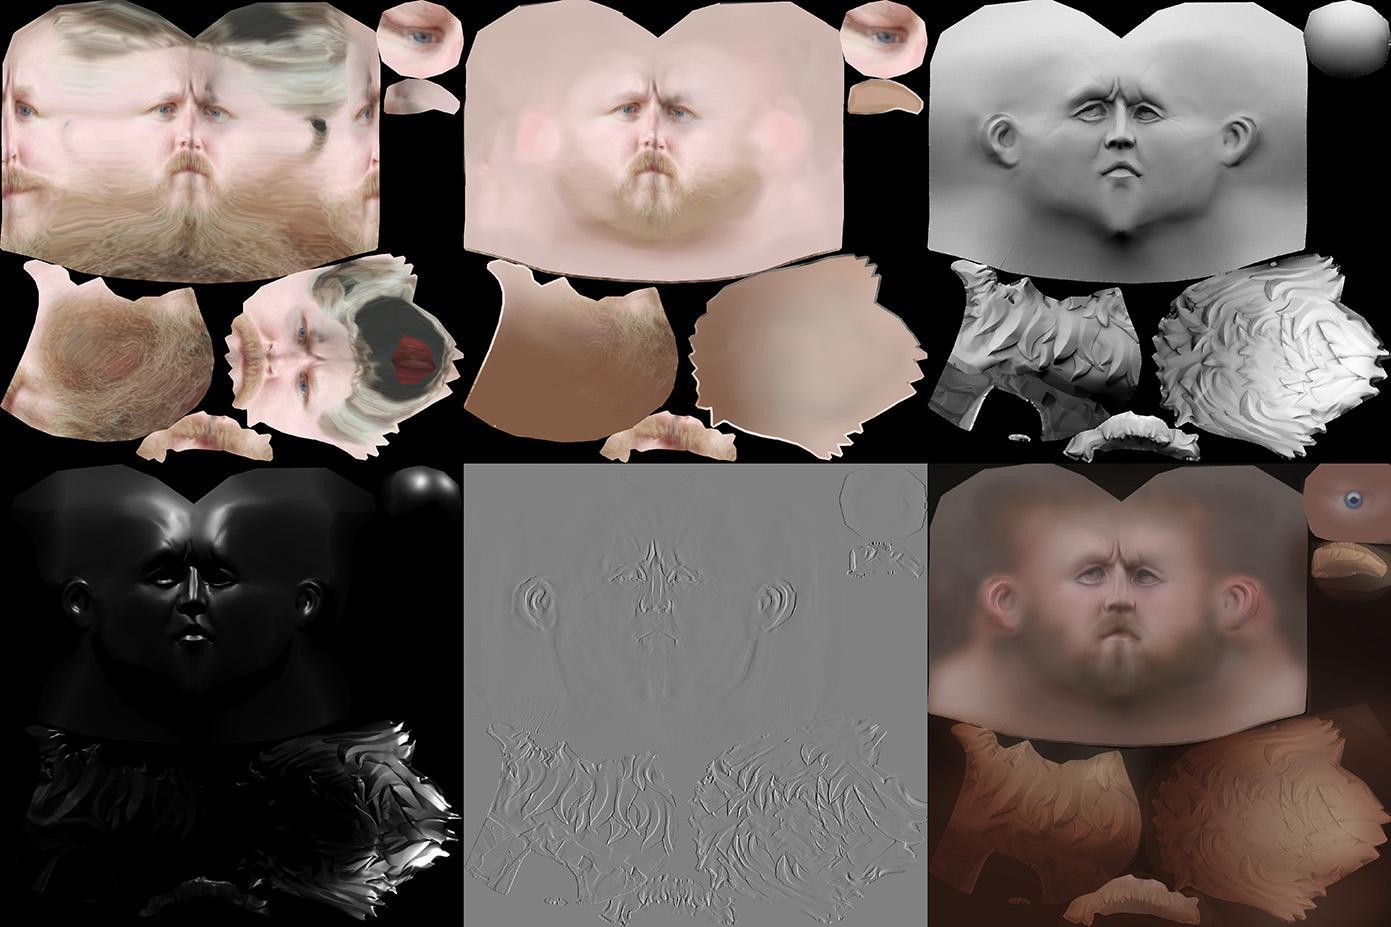
My texturing process consists of old bad habits and destructive workflow. I bake out a bunch of different passes and composite the final texture in Photoshop.
And of course the process is repeated for Humppa.

And here are the gentlemen. Rendered in Unity.
Familiar faces!